1、概述
截图是一个非常常见的功能。但是Windows自带的截图功能我们发现并不好用。所以很多时候我们打开QQ就是为了做一个截图。QQ的截图功能还是非常强大的,今天,我将用Qt4手工做一个简单的截图。这个截图比不上QQ的截图,只实现了基本功能。没有复杂的操作,供大家学习、参考。
2、需求描述
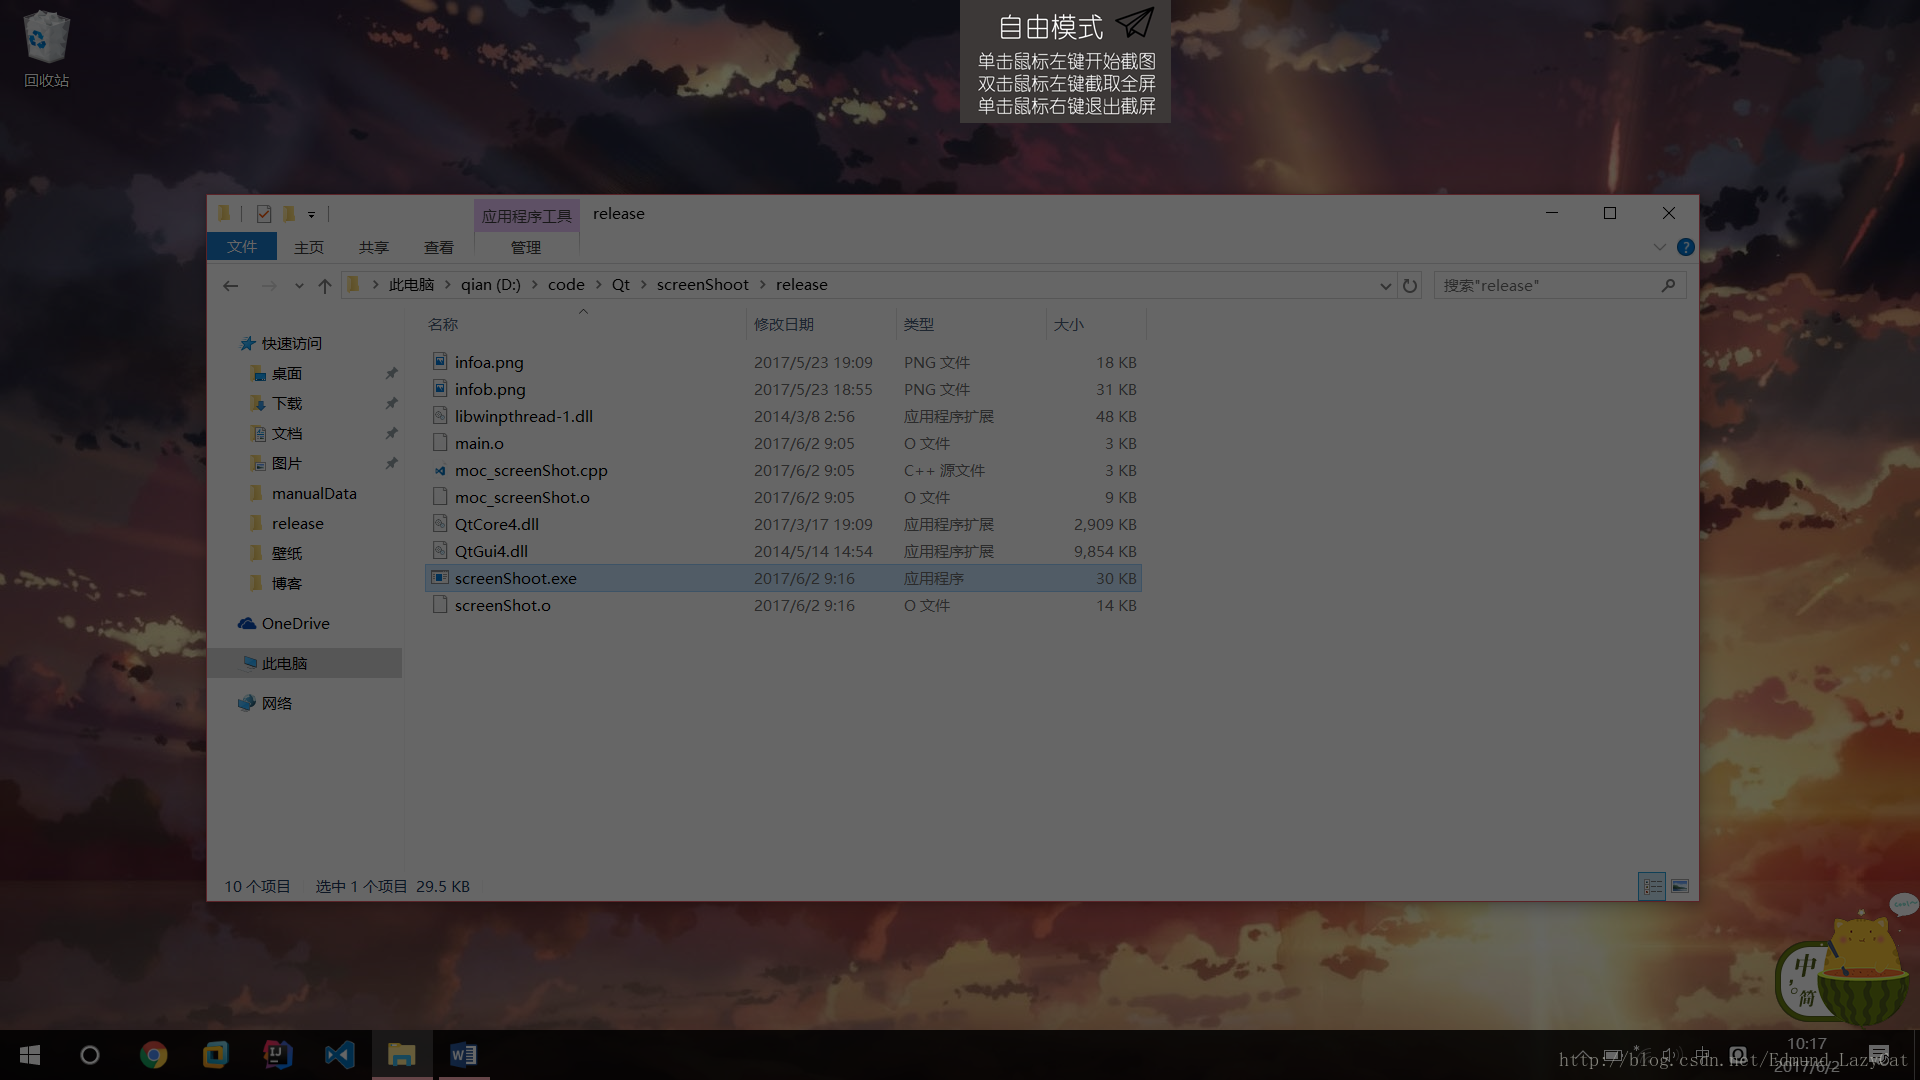
最终成品是一个可执行的exe文件,运行平台是Windows操作系统(经过我的测试,在Windows7、10下均可以完美运行)。 打开软件后,屏幕变暗,进入“自由模式”,在这个模式下,鼠标可以自由移动。自由模式可以做以下的事情:
- 自由模式上面显示一个图片表示当前位于自由模式下,鼠标左键单击图片,图片会消失。
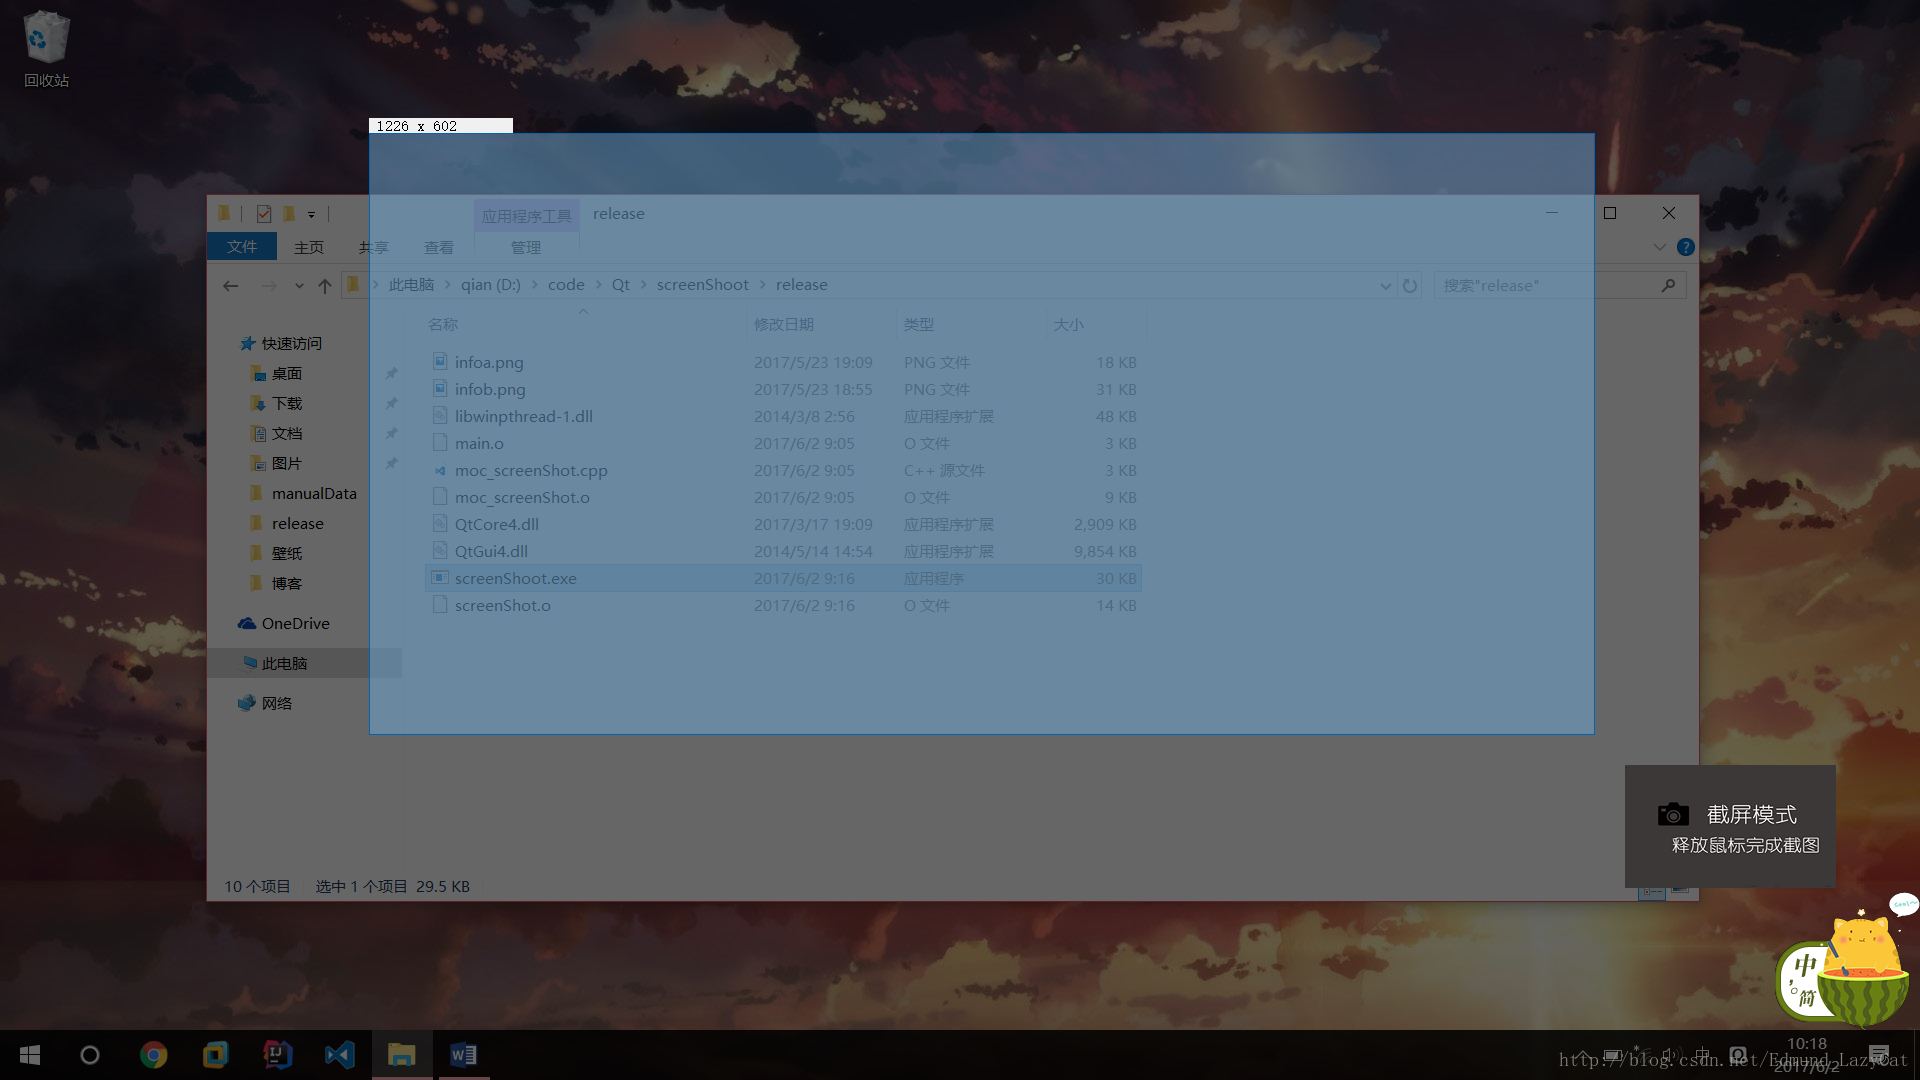
- 单击鼠标左键,开始抓图,进入“截屏模式”,上面的图片自动消失。在这个模式下,鼠标按住拖动会产生一个橡皮框。表示要截图的区域。橡皮框左上角会产生一个QLabel指示这个橡皮框的大小(像素)。
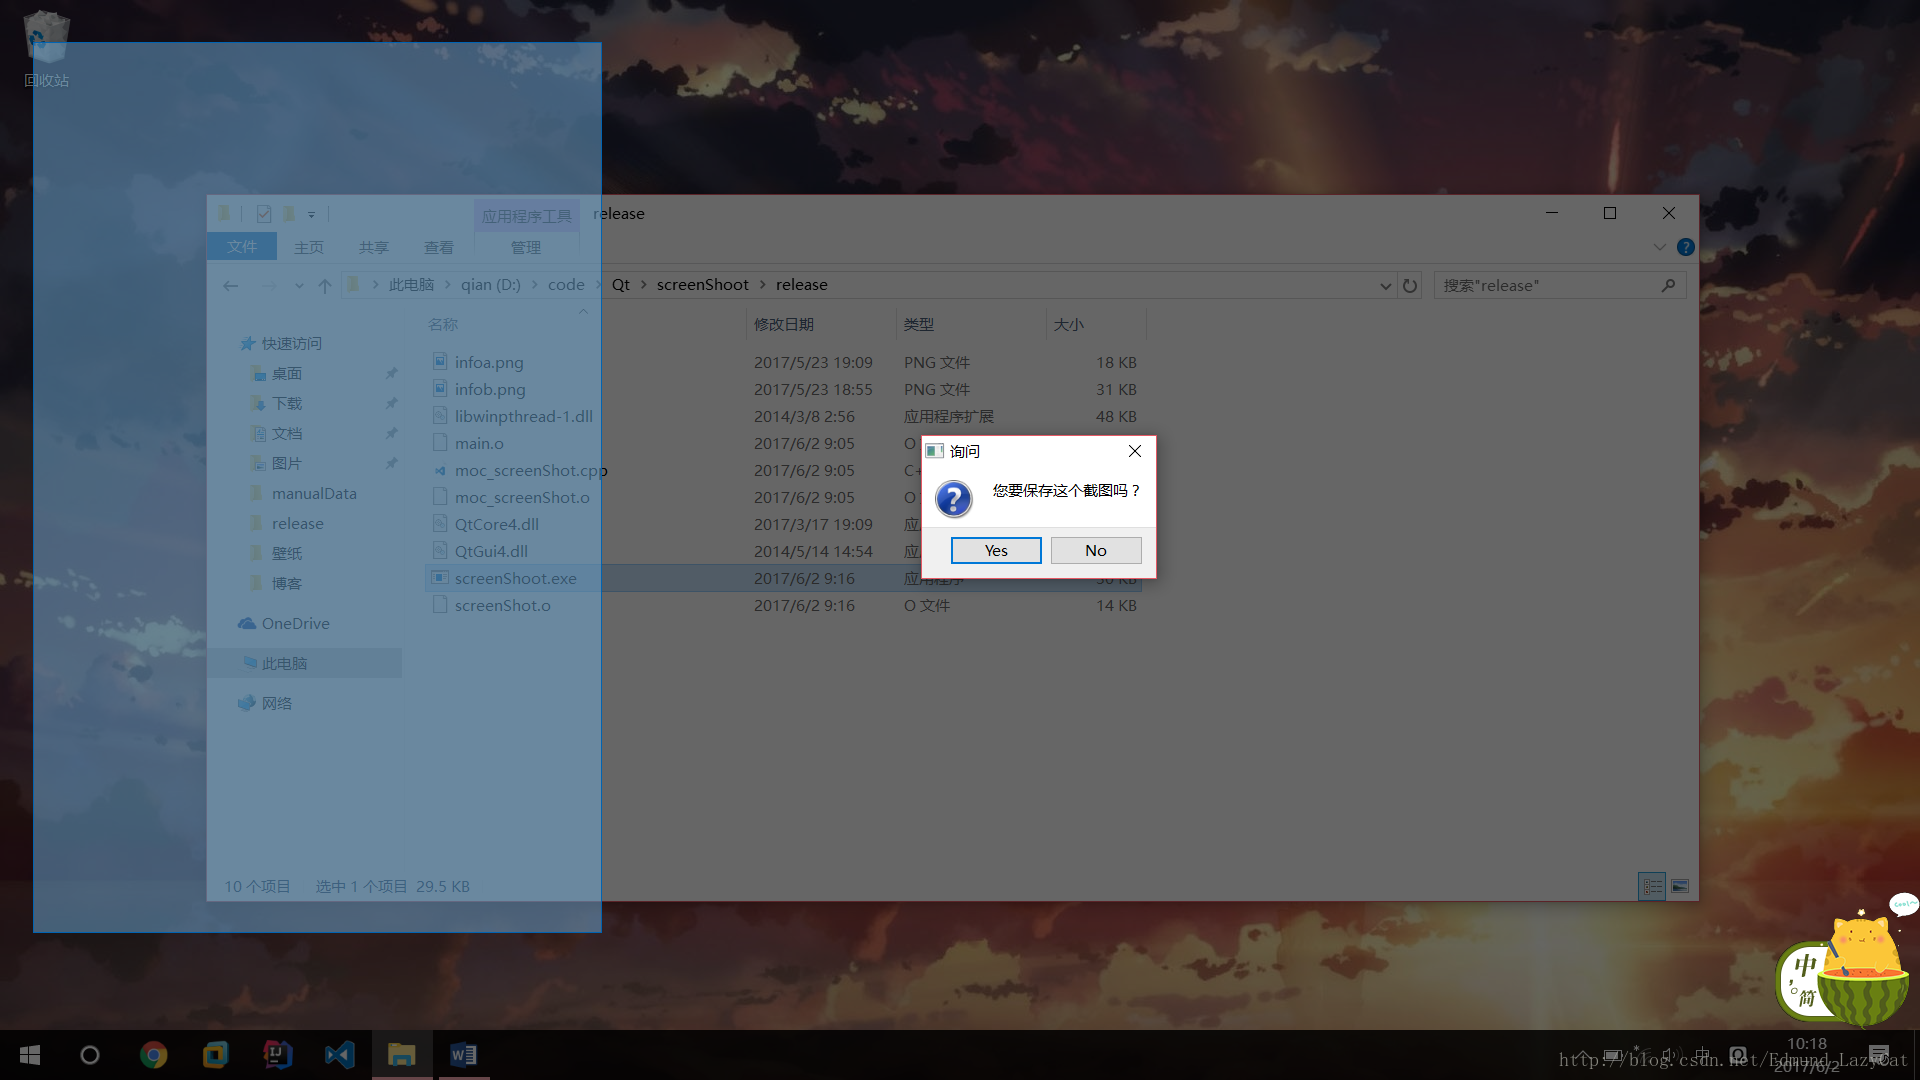
- 松开鼠标后,程序会询问用户是否要保存图片,如果用户选择“yes”,那么会弹出一个保存文件的对话框,图片只能保存为png格式的。程序这时候会抓取橡皮框区域的图片,保存并且退出。如果用户选择“no”,橡皮框和QLabel均消失。
- 在自由模式下双击鼠标左键自动截取全屏。
- 在自由模式下单击鼠标右键不截图,直接退出程序。
3、软件截图
自由模式:
截图模式:
询问用户:
3、开发环境
本软件采用Qt 4.8.7 开发,操作系统为Windows10 64位。没有使用QtDesigner、QtCreator。 编译环境为mingw32 4.8.2
4、分析
注意:下面只分析和截图功能有关的代码,很多细枝末节(如图片提示、文件保存)代码不再解释。 要想实现这个程序,思路其实很简单。我们只要获取当前整个桌面的图片,把这个图片设置为主窗口的背景图片。然后让主窗口充斥整个桌面。 获取整个桌面并不难,Qt是有直接提供实现的。我们看QPixmap的如下成员函数:
1
QPixmap	grabWindow ( WId window, int x = 0, int y = 0, int width = -1, int height = -1 )
关心第一个参数,它表示要截取的Window ID。这里我们要截取整个桌面,使用QApplication::desktop()->winId()即可。后面的参数不需要关心,默认它就是截取整个窗口的。 我们只需要把主窗口的背景设置为这个图片,大小设置为图片的大小。还需要把主窗口的状态栏隐藏,实现也很简单,利用setWindowFlags()设置Qt::FramelessWindowHint即可。 获取整个桌面的QPixmap以后,我们需要两份副本。一份用来变暗并显示在主窗口上,另外一份是原本,用于稍后真正的截图。 一个懊恼的问题是我们如何把图片变暗。我找了很多方法,这里采用一个简单的:把图片的三原色全部乘以一个倍数。注意,QPixmap并没有获取三原色的方法,所以我只好把QPixmap转换为QImage。这里我使用了一个中间文件temp.png。效率略低,有更好方法的小伙伴欢迎评论。
1
2
3
4
	whole_window.save("temp.png");
	bg = QImage("temp.png");
	QFile *temp = new QFile("temp.png");
	temp->remove();
whole_window表示用grabWindow抓取的QPixmap,bg是一个QImage类对象,它们都是主窗口类的成员。 接着,使用以下手段使QImage变暗:
1
2
3
4
5
6
7
8
9
10
	int red,green,blue;
	for(int i = x; i < width; i++){
        for(int j = y; j < height; j++){
			//三原色全部乘以一个倍数,实现屏幕的变暗
            red = qRed(bg.pixel(i, j)) * bright ;
            green = qGreen(bg.pixel(i, j)) * bright;
            blue = qBlue(bg.pixel(i, j)) * bright;
            bg.setPixel( i, j, qRgb(red, green, blue));
        }
    }
然后我们重写paintEvent事件把bg设置为主窗口的背景图片:
1
2
3
4
5
void screenShot::paintEvent(QPaintEvent *event){
   QPainter painter(this);
   //把bg设置为整个窗口的背景图片
   painter.drawImage(0, 0, bg);
}
这就实现了点开程序,整个桌面变暗的假象了。 接下来,整个程序的关键来了:在用户点击鼠标左键的时候,我们需要开始抓图。这需要我们重写主窗口的鼠标事件:
1
2
3
4
5
void mousePressEvent(QMouseEvent *e);
void mouseMoveEvent(QMouseEvent *e);
void mouseReleaseEvent(QMouseEvent *e);
void mouseDoubleClickEvent(QMouseEvent *event);
四个事件分别对应于鼠标移按下、移动、松开、双击。 我们重点关心鼠标按下。 在鼠标按下的时候,我们需要创建一个橡皮框显示抓图的区域。这使用到一个叫做QRubberBand的类。Qt的帮助文档是这样介绍这个类的:
The QRubberBand class provides a rectangle or line that can indicate a selection or a boundary. You can create a QRubberBand whenever you need to render a rubber band around a given area (or to represent a single line), then call setGeometry(), move() or resize() to position and size it. A common pattern is to do this in conjunction with mouse events.
文档说,这个类可以表示一块区域。我们可以通过resize改变大小,move改变框的位置。 那么,把它设置为主窗口的一个成员,当鼠标单击时,实例化橡皮框。鼠标移动时,改变橡皮框的大小。(具体大小需要计算) 为了实现截图,我们需要记录鼠标按下和松开的位置(计算出截图区域的长宽)。在主窗口的成员中保存两个QPoint对象start和end即可。 这需要我们取得鼠标的位置,很简单,通过QMouseEvent的pos()即可完成。注意它返回的是QPoint类对象。 在鼠标左键按下时,记录鼠标的初始位置:
1
start = e->pos();
鼠标移动时,我们需要实时改变橡皮框的大小,实现如下:
1
2
3
4
5
6
7
8
9
//记录鼠标移动的位置
end = e->pos();
//计算框的大小
int width = abs(end.x() - start.x());
int height = abs(end.y() - start.y());
//计算框的位置
int x = start.x() < end.x() ? start.x() : end.x();
int y = start.y() < end.y() ? start.y() : end.y();
在鼠标松开以后,我们需要记录鼠标点击和松开的位置,计算出要抓取屏幕的大小。然后开始截屏,截屏完成后,退出程序:
1
2
3
4
5
6
7
8
//取得鼠标松开的位置
end = e->pos();
//隐藏框
rubber->hide();
//调用截屏函数
this->grapScreen();
//关闭
this->close();
在grapScreen()成员函数中,我们需要实现真正的截图,这里使用QPixmap的copy函数取得桌面原本图片(注意,不是变暗的bg)的一个子图片。copy函数的原型如下:
1
QPixmap QPixmap::copy ( int x, int y, int width, int height ) const
只要提供初始位置(x,y),图片大小(width,height),我们就可以获取要抓取的图片。初始位置就是start或者end坐标。大小我们可以利用start和end计算得出:
1
2
3
4
5
int width = abs(start.x() - end.x());
int height = abs(start.y() - end.y());
int x = start.x() < end.x() ? start.x() : end.x();
int y = start.y() < end.y() ? start.y() : end.y();
接着调用QPixmap的save即可保存图片。 以上就是截图核心功能的一个解释,还有很多细节我没有解释,大家看代码自行理解。
5、 代码实现
- screenShot.h 主窗口类声明
1
2
3
4
5
6
7
8
9
10
11
12
13
14
15
16
17
18
19
20
21
22
23
24
25
26
27
28
29
30
31
32
33
34
35
36
37
38
39
40
41
42
43
44
45
46
47
48
49
50
51
52
53
54
55
56
57
58
59
60
61
62
63
64
65
66
#ifndef _SCREEN_SHOT_H_
#define _SCREEN_SHOT_H_

#include <QWidget>
#include <QRubberBand>
#include <QLabel>
#include <QScreen>
#include <QPoint>
#include <QString>
#include <QPalette>
#include <QFileDialog>
#include <QDesktopServices>

#include <QPixmap>
#include <QImage>

class screenShot : public QWidget{
	Q_OBJECT

public:

	screenShot(QWidget *parent = 0);

	void mouseMoveEvent(QMouseEvent *e);
	void mousePressEvent(QMouseEvent *e);
	void mouseReleaseEvent(QMouseEvent *e);
	void mouseDoubleClickEvent(QMouseEvent *event);

	void keyPressEvent(QKeyEvent *e);
	void setLabel();

	void changeLight(int x, int y, int width, int height, double bright);

	void paintEvent(QPaintEvent *event);

	void show();

	void grapScreen();

	~screenShot();

private:

	QRubberBand *rubber;

	QLabel *label;

	QPoint start;
	QPoint end;

	QPixmap whole_window;
	QPixmap image;

	QImage *info;
	QLabel *info_label;

	QImage bg;

	int s_height;
	int s_width;

	QPushButton *button;
};


#endif //screenShot.h
- screenShot.cpp 主窗口类实现
1
2
3
4
5
6
7
8
9
10
11
12
13
14
15
16
17
18
19
20
21
22
23
24
25
26
27
28
29
30
31
32
33
34
35
36
37
38
39
40
41
42
43
44
45
46
47
48
49
50
51
52
53
54
55
56
57
58
59
60
61
62
63
64
65
66
67
68
69
70
71
72
73
74
75
76
77
78
79
80
81
82
83
84
85
86
87
88
89
90
91
92
93
94
95
96
97
98
99
100
101
102
103
104
105
106
107
108
109
110
111
112
113
114
115
116
117
118
119
120
121
122
123
124
125
126
127
128
129
130
131
132
133
134
135
136
137
138
139
140
141
142
143
144
145
146
147
148
149
150
151
152
153
154
155
156
157
158
159
160
161
162
163
164
165
166
167
168
169
170
171
172
173
174
175
176
177
178
179
180
181
182
183
184
185
186
187
188
189
190
191
192
193
194
195
196
197
198
199
200
201
202
203
204
205
206
207
208
209
210
211
212
213
214
215
216
217
218
219
220
221
222
223
224
225
226
#include "screenShot.h"

#include <QtGui>

screenShot::screenShot(QWidget *parent)
	:QWidget(parent),
	rubber(NULL),
	label(new QLabel("")),
	start(QPoint(0, 0)),
	end(QPoint(0, 0)),
	whole_window(QPixmap::grabWindow(QApplication::desktop()->winId())),
	image(QPixmap()),
	info(new QImage("infoa.png")),
	info_label(new QLabel("")),
	s_height(0),
	s_width(0),
	button(new QPushButton())
{
	//此语句解决中文乱码情况
	QTextCodec::setCodecForCStrings(QTextCodec::codecForName("UTF-8"));

	//此处把QPixmap转换为QImage
	//因为只有QImage才可以设置三原色
	whole_window.save("temp.png");
	bg = QImage("temp.png");
	QFile *temp = new QFile("temp.png");
	temp->remove();

	changeLight(0, 0, bg.width(), bg.height(), 0.6); //把图片变暗

	//获取桌面尺寸
	QDesktopWidget *d_widget = QApplication::desktop();
	QRect d_rect = d_widget->screenGeometry();
	s_width = d_rect.width();
	s_height = d_rect.height();
	//设置窗口大小为桌面尺寸
	this->resize(s_width, s_height);

	//这个按钮是用户第一次打开程序的提示
	button->setIcon(QIcon("infob.png"));
	button->setWindowFlags(Qt::FramelessWindowHint | Qt::WindowStaysOnTopHint);
	button->setIconSize(QSize(211, 123));
	button->setGeometry(s_width / 2, 0, 211, 123);
	button->show();
	//用户点击按钮后,按钮消失
	connect(button, SIGNAL(clicked()), button, SLOT(close()));

	//窗口和坐标信息置于整个屏幕顶端
	label->setWindowFlags(Qt::FramelessWindowHint | Qt::WindowStaysOnTopHint);
	this->setWindowFlags(Qt::FramelessWindowHint);
}

void screenShot::changeLight(int x, int y, int width, int height, double bright){
	int red,green,blue;
	for(int i = x; i < width; i++){
        for(int j = y; j < height; j++){
			//三原色全部乘以一个倍数,实现屏幕的变暗
            red = qRed(bg.pixel(i, j)) * bright ;
            green = qGreen(bg.pixel(i, j)) * bright;
            blue = qBlue(bg.pixel(i, j)) * bright;
            bg.setPixel( i, j, qRgb(red, green, blue));
        }
    }
}

void screenShot::mousePressEvent(QMouseEvent *e){

	if(e->button() == Qt::LeftButton){

		//初始化提示信息框
		info_label->setPixmap(QPixmap::fromImage(*info));
		info_label->setWindowFlags(Qt::FramelessWindowHint | Qt::WindowStaysOnTopHint);
		info_label->move(QPoint(e->pos().x() + 30, e->pos().y() + 30));
		info_label->show();

		button->close();

		if(!rubber){
			//初始化框
			rubber = new QRubberBand(QRubberBand::Line, this);
		}
		//显示框
		rubber->show();
		//记录初始鼠标位置
		start = e->pos();
		//将框放置于起始位置,且大小为0x0
		rubber->setGeometry(start.x(), start.y(), 0, 0);

		//调用此函数,显示坐标
		setLabel();
    } else if(e->button() == Qt::RightButton) { //鼠标右键点击,退出程序
		button->close();
		info_label->close();
		this->close();
    }
}

void screenShot::mouseDoubleClickEvent(QMouseEvent *event)
{
    // 此处应该截取全屏
    if(event->button() == Qt::LeftButton){
		button->close();

		QString fileName = QFileDialog::getSaveFileName(this,
                                        tr("保存图片"),
                                        ".",
                                        tr("Image Files(*.PNG)")); //此处只支持png格式的图片

		whole_window.save(fileName);
		info_label->close();
		this->close();

    }
}

void screenShot::mouseMoveEvent(QMouseEvent *e){

	if(rubber){
		info_label->move(QPoint(e->pos().x() + 30, e->pos().y() + 30));
		//记录鼠标移动的位置
		end = e->pos();
		//计算框的大小
		int width = abs(end.x() - start.x());
		int height = abs(end.y() - start.y());
		//计算框的位置
		int x = start.x() < end.x() ? start.x() : end.x();
		int y = start.y() < end.y() ? start.y() : end.y();
		//更新框的位置
		rubber->setGeometry(x, y, width, height);
		//changeLight(x, y, width, height, 1.25);
		//改变坐标显示
		setLabel();
	}
}

void screenShot::mouseReleaseEvent(QMouseEvent *e){


	if(rubber){
		info_label->hide();
		label->hide();

		QMessageBox::StandardButton res
				= QMessageBox::question(this, "询问", "您要保存这个截图吗?",
				QMessageBox::Yes | QMessageBox::No);

		if(res == QMessageBox::Yes){
			//取得鼠标松开的位置
			end = e->pos();
			//隐藏框
			rubber->hide();
			//调用截屏函数
			this->grapScreen();

			//关闭
			this->close();
		} else {
			//用户不保存图片,返回自由模式
			button->show();
			rubber->close();
			info_label->hide();
			label->hide();
		}
	}
}

void screenShot::grapScreen(){
	int width = abs(start.x() - end.x());
	int height = abs(start.y() - end.y());
	int x = start.x() < end.x() ? start.x() : end.x();
	int y = start.y() < end.y() ? start.y() : end.y();

	//截取指定大小的图片
	image = whole_window.copy(x, y, width, height);


	QString fileName = QFileDialog::getSaveFileName(this,
                                        tr("保存图片"),
                                         ".",
                                        tr("Image Files(*.PNG)"));

	//保存图片
	bool flag = image.save(fileName);
	if(flag){
		QMessageBox::information(this, "信息", "图片保存成功!");
	}

}

void screenShot::setLabel(){
	int width = abs(start.x() - end.x());
	int height = abs(start.y() - end.y());
	int x = start.x() < end.x() ? start.x() : end.x();
	int y = start.y() < end.y() ? start.y() : end.y();

	//设置标签内容
	QString str = QString(" %1 x %2        ").arg(width).arg(height);
	label->setText(str);

	//重定位标签的位置
	QRect rect(label->contentsRect());
	label->move(QPoint(x, y - rect.height()));
	label->show();

}

void screenShot::keyPressEvent(QKeyEvent *event){

	this->close();

}

screenShot::~screenShot(){
	//...
}

void screenShot::show(){

	QWidget::show();
}

void screenShot::paintEvent(QPaintEvent *event){
   QPainter painter(this);
   //把bg设置为整个窗口的背景图片
   painter.drawImage(0, 0, bg);
}
- main.cpp
1
2
3
4
5
6
7
8
9
10
11
12
13
14
15
16
17
18
19
#include "screenShot.h"
#include <QApplication>
#include <QCoreApplication>
#include <QTextCodec>
#include <windows.h>

int main(int argc, char *argv[]){

	QTextCodec *codec = QTextCodec::codecForName("UTF-8");
	QTextCodec::setCodecForTr(codec);
	QTextCodec::setCodecForLocale(codec);
	QTextCodec::setCodecForCStrings(codec);

	QApplication a(argc, argv);
	screenShot *ss = new screenShot();
	ss->show();

	return a.exec();
}
以上代码仅作参考!
6、问题
本程序尚存在如下问题:
- 图片只能保存png格式的,这是硬伤;
- 截图并没有做到顶置(为了显示提示信息),这导致一些顶置的程序无法截进去,如输入法等;
- 把QPixmap转换为QImage对象用到中间文件,效率低;
- 三原色全部乘以倍数的手法导致程序效率不高。在一些配置较差电脑上,点开程序可能要等一段时间才能开始截图,这可能导致用户无法准确截取一些视频动画;
- 单机鼠标右键退出以后,返回桌面也会产生鼠标右键点击的效果,这个问题我认为还是窗口没有顶置造成的。